Mastering the simple yet essential skill of buttoning a dress shirt is fundamental for presenting a sharp and professional appearance. A well-buttoned dress shirt lays the foundation for a polished look, whether it’s for formal occasions or everyday office wear. Understanding the proper sequence and technique can help prevent wrinkles or misalignment that might detract from your overall style.

Ensuring that each button is securely fastened while aligning the shirt’s placket straight is crucial for maximum comfort and a clean presentation.
While it might seem straightforward, correctly buttoning a dress shirt involves starting from the right point—typically the bottom or the middle button—to maintain symmetry and an even drape of the fabric. Attention to these details underpins both the style and the functionality of your dress shirt.
Key Takeaways on How to Button a Dress Shirt
- Ensuring every button is fastened correctly is key to a smart appearance.
- Starting the buttoning process from the appropriate button helps maintain shirt symmetry.
- Correct technique provides comfort and enhances the shirt’s overall style.
Check out these other top picks:
- Button Down Collar vs. Spread Collar
- Are Button Down Collars Out of Style?
- When Should You Wear a Cutaway Collar?
Understanding the Dress Shirt
A dress shirt is more than just a wardrobe staple; it’s a symbol of professionalism and style. I’ll walk you through the essential aspects of a shirt’s anatomy and the various collar styles to help you make informed choices about your attire.
Anatomy of a Dress Shirt
The collar is perhaps the most noticeable part of a dress shirt and one that can dictate the formality level. It’s structured with a band, points, and sometimes collar stays for added crispness. The buttons down the front are set on a placket, which helps maintain the shirt’s shape.
The yoke is a piece of fabric that spans the shoulders and is critical for a good fit. Shirts often have a longer tail in the back to stay neatly tucked in. The sleeve joins at the yoke with a seam and ends in cuffs, which are usually secured with buttons or cufflinks. The shirt collar plays a significant role in framing the face, and therefore, choosing the right type is important for your overall appearance.
Types of Collars
- Point Collar: This is the most common collar style, marked by a narrow distance between the collar points. It’s versatile and works well with or without a tie.
- Spread Collar: With a wider space between points, this collar allows for a larger tie knot and offers a more modern look.
- Button-down Collar: The points are fastened down with buttons, granting a preppy and casual appeal. It’s excellent for a smart but laid-back style.
- Cutaway Collar: Exhibiting an extreme spread, this collar style is for those who prefer a bold look and larger tie knots.
Understanding the nuances of a dress shirt is key to elevating my presentation. Each element, from the collar down to the cuffs, orchestrates in harmony to showcase formality, professionalism, or casual elegance. The right collar can accentuate my face shape and ensure that my attire is appropriate for any given setting.
Preparing to Button a Dress Shirt
Buttoning a dress shirt properly is essential for a polished look. Before I fasten any buttons, I make sure the shirt is fitted correctly and ironed to perfection.
Selection and Fit
When chosing a dress shirt, fit is paramount. I ensure that it’s not too loose or too tight around my chest, shoulders, and waist. The collar should allow for one to two fingers when buttoned, ensuring it’s snug, yet comfortable. The sleeves must end at the hinge of my wrist, allowing for subtle exposure of the cuff when paired with a jacket.
Ironing Basics
Ironing is crucial for a wrinkle-free appearance.Always start with a clean shirt and use a steam iron for the best results. The process includes:
- Collar: I lay it flat and iron from the points inward to avoid creases.
- Cuffs: I unbutton them and lay them flat, then iron the inside and outside.
- Front: I work around the buttons, not over them, pressing from the bottom up.
- Back: I most often iron in a vertical motion to align with the fabric’s weave.
- Sleeves: I smooth them out and press from the top down, aligning any pleats.
By taking these steps, my shirt looks cleaner and feels more comfortable, paving the way for proper buttoning.
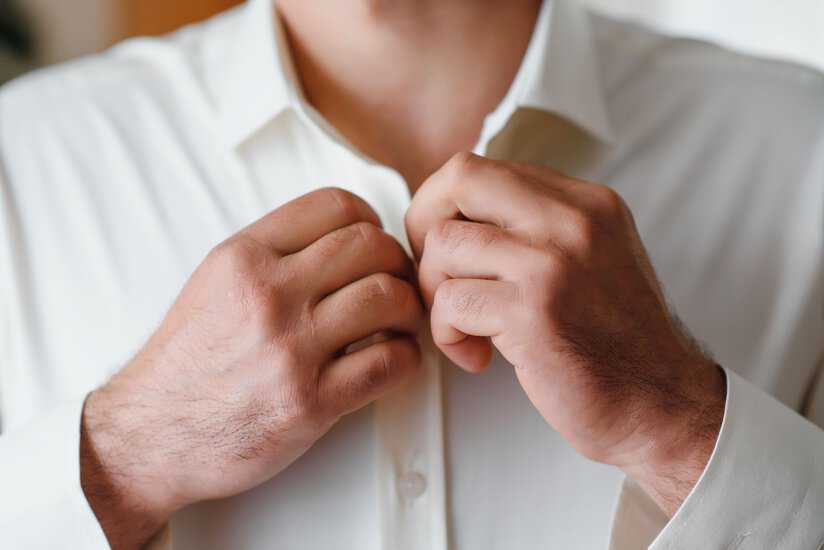
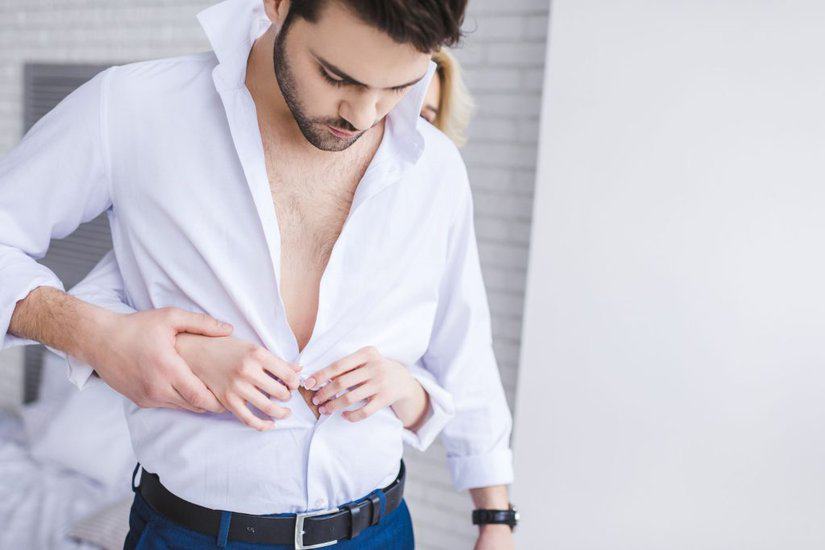
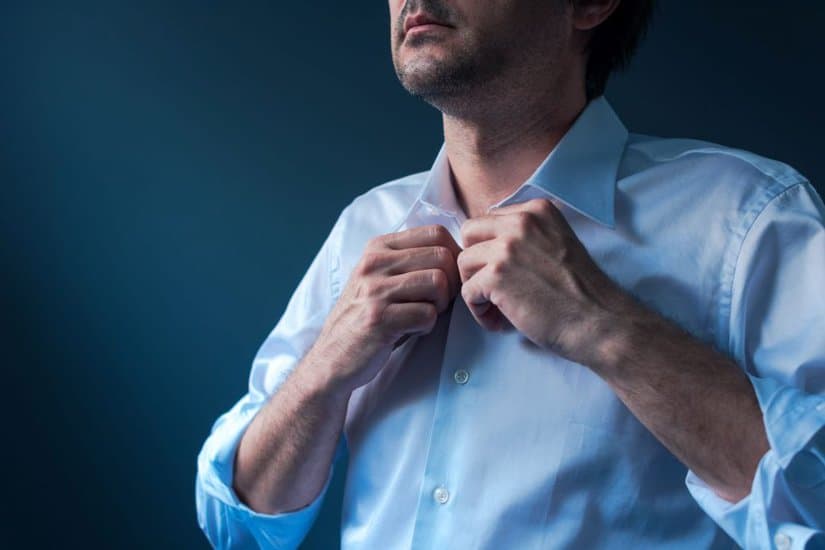
Buttoning Techniques
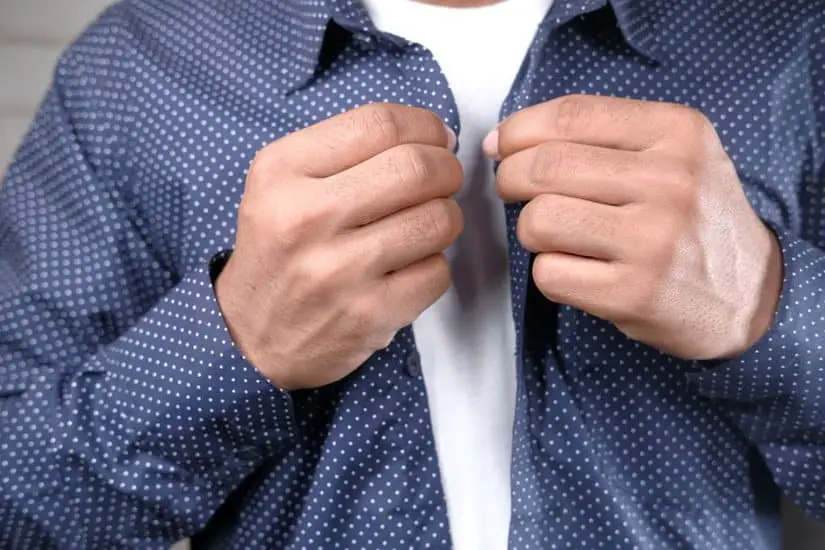
When buttoning a dress shirt, it’s essential to ensure that each button aligns with its corresponding buttonhole for a neat appearance. My approach to buttoning up involves working from top to bottom on the shirt’s front, and paying close attention to the cuff fastenings for a polished look.
Buttoning the Front
I start with the shirt laid out flat to align all the buttonholes. Beginning at the top, I secure the first button to set the shirt in place. I then proceed downward, smoothly buttoning each successive shirt button, ensuring there’s no bunching or misalignment between the shirt tails.
Cuff Styles and Their Fastenings
Button Cuffs: These are standard on most dress shirts and involve a single button or two buttons side by side. I fasten these by folding the cuff over and lining up the buttonholes to effortlessly secure the buttons.
French Cuffs: These are more formal, requiring cufflinks. I fold the cuff back onto itself so that the holes align. Then, I insert the cufflink through all four layers, securing the cufflink’s toggle to hold the French cuffs in place.
Style and Accessorizing
When I button a dress shirt, it’s more than ensuring every button is in place. It’s about creating a look that resonates with my sense of style, whether that’s formal or casual. The right accessories are crucial in defining this style.
Coordinating with Ties
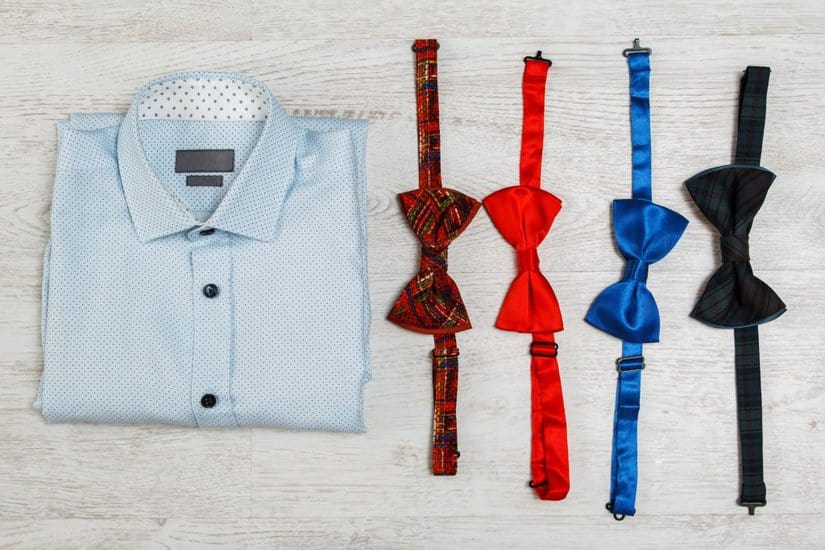
When selecting a tie, I consider the occasion. For formal events, I favor a silk tie with a subdued pattern or a solid color that complements my shirt and suit. The width of the tie should balance my suit’s lapel width and my own proportions. To maintain a sharp collar look, especially with wider ties, I sometimes use collar stays. These small additions keep my collar points straight and in place.
Choosing the Right Accessories
I choose accessories based on the setting. For a formal outfit, I often opt for cufflinks—they add a touch of sophistication and showcase personal style. Cufflinks should match the metal of my watch or belt buckle to maintain a cohesive appearance.
If I’m dressing more casually, I might skip the cufflinks and roll up my sleeves for a relaxed vibe. In both cases, ensuring the accessories match the tone of my attire is key for a polished look.
Care and Maintenance

In ensuring the longevity of my dress shirts, I focus on proper washing and drying techniques as well as prompt and effective stain removal. This attention to detail helps maintain the shirt’s quality and appearance.
Washing and Drying
I always start by checking the care label for any specific instructions. For washing, I sort my dress shirts by color and fabric type before placing them in the washing machine. I use a gentle cycle with cold water to prevent shrinkage and opt for a mild detergent that’s less likely to harm the fibers.
For dryer use, I choose a low heat setting or allow the shirts to air dry on a hanger to minimize wrinkles. Shirts labeled as wrinkle-free may still benefit from this approach to preserve their finish.
- Washing Machine Method:
- Sort by color and fabric.
- Cold water, gentle cycle.
- Mild detergent.
- Drying Method:
- Low heat or air dry.
- Hang to maintain shape.
Stain Removal
When I encounter stains, particularly those caused by perspiration, I act quickly. Pre-treating the area with a stain remover or a bit of detergent prior to a wash can make a significant difference.
For stubborn stains, I might consider professional dry cleaning as a last resort, since it can be harsh over time. It’s critical to address stains before they set in to keep my dress shirts in pristine condition.
- Stain Treatment Process:
- Apply stain remover or detergent to the stained area.
- Wash promptly to prevent the stain from setting.
By following these steps, I maintain the clean and professional look of my dress shirts with each wear.
Advanced Tips and Tricks
When it comes to ensuring your dress shirt looks impeccable, there are a couple of subtleties that make all the difference. I’ll focus on tactics to conquer persistent creases and the value of custom tailoring for the perfect silhouette.
Dealing with Creases
Creases can mar the sharp look of a dress shirt, but I’ve found that a consistent ironing technique makes a substantial impact. Before I begin, I ensure my ironing board is stable and covered with a clean, smooth pad to offer an ideal surface.
It’s crucial to apply steam to relax the fabric — a hot iron with a steam feature does wonders. I start with the collar, move to the cuffs, and then the sleeves, ensuring I smooth out any wrinkles. For the body, I work from the top down, being careful not to introduce new creases with my movements.
Tailoring for the Perfect Fit
A well-fitted shirt is transformative, and I recommend visiting a tailor to achieve this. After taking precise measurements, a tailor can make a series of adjustments ensuring the shirt complements my body shape.
This often involves altering the side seams for a closer fit, adjusting sleeve length, and sometimes modifying the collar size. A tailored shirt not only looks professional but also feels comfortable to wear throughout the day, as it eliminates excess fabric and any awkward tugging or bunching.
Tucking and Untucking
In my experience dressing for various occasions, I’ve found that understanding when and how to tuck in a dress shirt is crucial for a polished appearance. My focus here will be on the mechanics of a proper tuck as well as the scenarios that are most suitable for an untucked style.
The Proper Tuck
When I tuck in my dress shirt, I ensure that it fits snugly around my torso but is not too tight. The length of the shirt should be enough to stay tucked when I’m walking around or sitting down. I typically follow these steps:
- Start with pants unbuttoned: This gives me room to adjust the shirt effectively.
- Tuck evenly: I tuck my shirt tails into my pants evenly, making sure there are no bunches.
- The final check: After buttoning my pants, I raise my arms above my head to ensure the shirt stays tucked.
It’s important that the shirt tails are the right length; too short and they’ll come untucked easily, too long and they bunch up, making the tuck look bulky.
When to Leave Untucked
I leave my dress shirt untucked when the shirt’s design is casual, and the length is shorter, usually around the middle of my pant’s zipper. This casual style is suitable in informal settings or when I’m aiming for a more relaxed look.
- Casual shirts: Meant to be worn untucked, with a hem that ends mid-zipper for a clean, intentional look.
- Formal shirts: Generally have longer tails and should remain tucked in to maintain a neat, professional look.
When deciding between tucked and untucked, I also consider the event or environment I’ll be in, as well as the overall style I’m aiming for.
Troubleshooting Common Issues
When buttoning a dress shirt, I often encounter a few recurrent problems. I’ll address them by focusing on fitting issues, managing wrinkles, and replacing buttons, which can impact the shirt’s overall look and comfort.
Fitting Problems
If I find my dress shirt is too tight around the neck, I can’t comfortably button the top button. This usually means the collar size is not right for me. For a shirt that feels too loose, I check the overall fit of the shirt; sometimes the issue is with the shirt’s cut rather than just the collar.
- Solution for tight collar:
- Have the shirt professionally altered or buy a new shirt in the correct size.
- Solution for loose fit:
- Opt for slim-fit or tailored dress shirts that provide a closer fit without restricting movement.
Managing Wrinkles
Wrinkling can ruin a well-put-together appearance, making even a properly buttoned dress shirt look unkempt. To keep my shirt looking pressed and neat, I focus on proper ironing techniques and sometimes use spray starch for added crispness.
- Ironing steps:
- Start with a clean shirt.
- Preheat the iron to the recommended temperature.
- Iron the collar, cuffs, front placket, and then the rest of the shirt.
- Using spray starch:
- Apply a light, even layer of starch to the shirt before ironing for extra sharpness.
Replacing Buttons
It’s normal for buttons to come loose or fall off with wear. Instead of discarding the shirt, I replace the buttons to extend the garment’s life. Having a small sewing kit at home is handy for these quick fixes.
- Button replacement toolkit:
- Matching thread, a needle, scissors, and spare buttons.
- Steps to replace a button:
- Remove any loose threads from the previous button.
- Secure the new button with the thread, ensuring it’s tight but with enough give for easy buttoning.
By addressing these common issues with the solutions I’ve noted, I can ensure my dress shirts always look well-fitted, pressed, and presentable.
Frequently Asked Questions
In this section, I address some common inquiries about buttoning a dress shirt with the aim of clarifying best practices and offering styling tips.
What is the proper way to button a dress shirt for men?
The proper way to button a dress shirt for men is to start at the bottom and work your way up. The top button should be fastened for formal occasions or with a tie, otherwise it can be left unbuttoned for a more casual look.
In what order should you button a dress shirt?
You should button a dress shirt from the bottom up. This method helps align the buttons with the buttonholes and ensures the shirt is buttoned neatly and evenly.
Is it fashionable for women to button their shirts differently?
Yes, women often fasten their shirts with the bottom or middle buttons, leaving the top ones undone, for a relaxed fit or to style a button-down shirt openfor layered looks.
What can you do if the top button of a dress shirt is too tight?
If the top button is too tight, you can opt for a collar extender that adds extra space, ensuring comfort without altering the shirt’s fit.
How can you style a dress shirt to appear shorter or more fitted?
To make a dress shirt appear shorter or more fitted, try tucking it in and blousing it slightly over the waistband, or use a tailor to adjust its length and fit to your preference.
What are some creative ways to tie or style a button-up shirt for a chic look?
Creative ways to tie or style a button-up shirt include wearing it off one shoulder, tying the bottom hem in a knot, or layering it under a sweater for a collared shirt look.

Samoel Ovanessian is the founder and creator of StylishAlpha.com – a website dedicated to men’s fashion. As a proud owner of more than 200 ties, he loves digging through new clothing combinations for everyday use, formal events and even just for fun. You can read more about Samoel here.