
Are you looking for an answer to “How to Tie a Cravat?“
Cravats look stylish, but a lot of people struggle to even determine where to start. Many people are intimidated by the concept of wearing a cravat. There are many ways to tie a necktie. This article will go through some of the ways you can tie a cravat and have it suit your look. Before we begin, we have to understand what cravats are.
What is a Cravat?
The cravat is traditional neckwear that has its origins in the 17th century among the military ranks of the Croats. Today, the cravat, also known as the Ascot tie, has boomed in popularity at weddings and parties and among grooms alike.
From its traditional beginnings, the cravat has morphed into these beautiful well-tailored designs, fitting seamlessly in formal and informal settings. Depending on how the cravat is tied, it can be modeled for a different setting – formal or informal.
How to Tie a Cravat: Steps
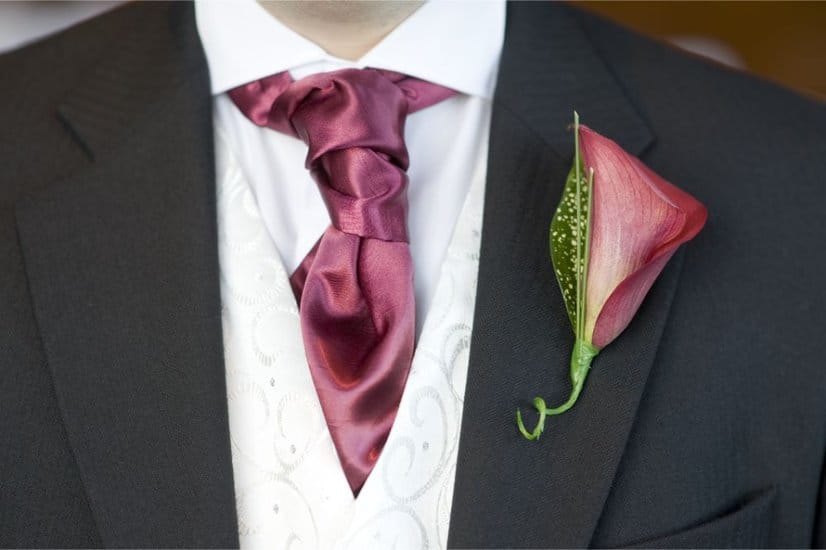
This is the formal type of cravat. It is often used for occasions that have close ties to traditionalism.
Step 1
Take the cravat and tie it around your neck.
Step 2
You will have one of the ends of the cravat being longer than the other. Take the longer end of the cravat and wrap it across the shorter end. Keep going until you have completed one loop for a second time. This will create a double fold.
Step 3
Do another round, only this time, when you get to the back, the thread that ends over the top once more then proceeds to tug on the loop until it’s hanging down on the front.
Step 4
Have the hanging end tucked in the waistcoat, then push the knot towards your neck. This should create a rouche or scrunchie effect, from where the name of the design comes from.

How to Tie a Wedding Cravat
This version of the cravat is more informal. It is primarily used when attending weddings but can also find a place at parties with a great emphasis on tradition. Keep your tie crease free by packing it properly for the trip.
Step 1
Like with the first one, put the cravat around your neck.
Step 2
Upon putting it on your neck, take the longer end of the cravat and wrap it so that the longer end is in front of the shorter end.
Step 3
Keep on wrapping the longer end of the cravat in front of the shorter end, until you have completed an entire loop with the long end in front of the shorter one.
Step 4
Once again, wrap the longer end of the cravat around the neck, only this time thread the long end over the upper part of the loop. Continue and pull the longer end through the knot to the point it is hanging down the front. The rest of the fabric should be tucked behind the waistcoat, completing the look.
There are other variations on the knot that can be used to achieve an even more stylish look. All these styles are slight variations of the methods above but can have dramatic changes to your style. Here are some of them:
The Barrel Knot
This is essentially the scrunchie knot but has minor key differences. Instead of having the longer frills tucked in the waistcoat as is tradition, in this style they are left out exposed. The knot is also changed; as opposed to having it higher hiding most of the neck, the knot is lower on the neck exposing the throat.
Though it may look like these are mistakes, they are very much intentional, giving the barrel knot its unique look. Another option is to have knots loose with the longer frills tucked in. This also looks like a mistake, as loose knots give this an untidy look. That is, however, not the case as the look is intentional and complete as is.
The Osbaldeston Cravat
This knot is also based on the primary formal knot. It sets itself apart as the knot is a couple of sizes larger than conventional knots. The knot is about 2 inches by 4 inches, with some of the ends being tucked into the shoulders or just left sticking out and hanging down the chest.
The Mailcoach/Waterfall Cravat
This gets its name from coach drivers who were required to wear one as part of their uniform. It looks very distinguished but it is simple to tie, requiring no assistance. The cravat cloth is required to be unstarched and very long, often made from cashmere for proper volume.
Though it has the basis of the knot in the basic scrunchie look, it differs in that the waterfall begins in the front crossing to the back of the neck and coming back to the front for a simple knot. As the cloth falls, it covers the knot giving this elegant look for the ages. It can be further exemplified with jeweled decorative pins to complete the look of a truly elegant man.
The a La Byron
This is essentially a bowtie, the only difference is that the ends, be they short or long, dangle loosely on the sides. This is not meant to be formal wear, being worn in the daytime often mixed with colorful or pattern neckcloths.
The Horse Collar
This is one of the more popular cravat styles. It was third in popularity after the basic and barrel style due to its ease of creation. At its basic, the knot was created after wrapping a cloth around three ties and having the short end stick out at an angle.
Conclusion
In the past centuries, cravats were very popular among men and many styles on how to wear them have cropped up. We hope this guide has helped showcase the versatility of this elegant piece of clothing. This was an important garment in the 1800s, a time when clothing was used to distinguish among the classes.
Luckily, although they are not as popular today, anyone can put on a cravat in any style they wish to without judgment. Looking at the styles of cravats today, we hope we can guide you through the comeback of the cravat, especially in colder weather.

Samoel Ovanessian is the founder and creator of StylishAlpha.com – a website dedicated to men’s fashion. As a proud owner of more than 200 ties, he loves digging through new clothing combinations for everyday use, formal events and even just for fun. You can read more about Samoel here.